Pages

Thursday, May 30, 2013

Brand Loyalty

Seems it's been far too long....


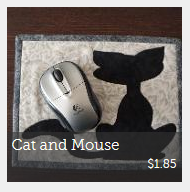
I really haven't ever been loyal to one specific brand name; generally I use products from a variety of companies, as price and availability are two constants that determine my purchasing trends.

However, since I love working with fused applique I've ALWAYS used Steam-A-Seam fusible web. It was the product that was recommended and used in my first applique quilting class I took. It still is what I like using today; until... the company had manufacturing issues and the stores ran out of it.


THERE IS ONLY ONE DECISION TO MAKE:
Stop all applique work until it returns; or.. try another fusible web product, for now.


At the time, I was working on my Flag Quest project and it used a LOT of fusible web; thereby, depleting my Steam-A-Seam supply to mere scraps. Had I known ahead of time, I could of used another product for the larger pieces. But... that isn't how life dishes out opportunity, now is it?

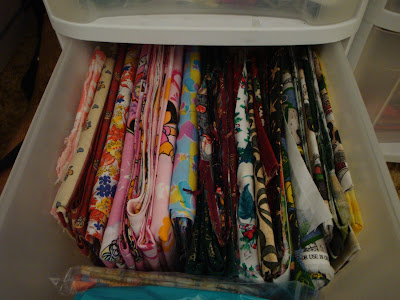
After waiting several weeks to get to check another quilting store, I was faced with that opportunity. No Steam-A-Seam!! The product that was available was 805 Wonder-Under and as quilting must go on, I purchased four metres of the stuff; hoping I could work with it.

I came across a blog post that gave me hope and helped me feel it was going to be okay. (Sorry, I can't give you the link as I can't locate it again.) With this method, large pieces of fabric are fused and the paper is taken off before the appliques are created. This solves the issue of  accidently fraying the applique pieces when taking off the release paper.

For me, this method is not workable, as I only want to fuse small individual pieces on a large variety of fabrics. I still did not think it would be the solution for my projects. Now, how to get those applique pieces to release from the paper?


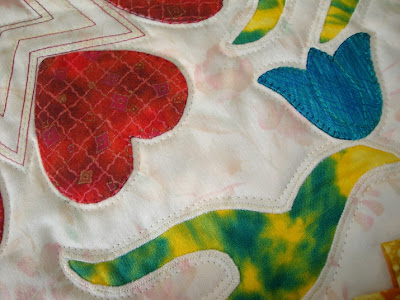
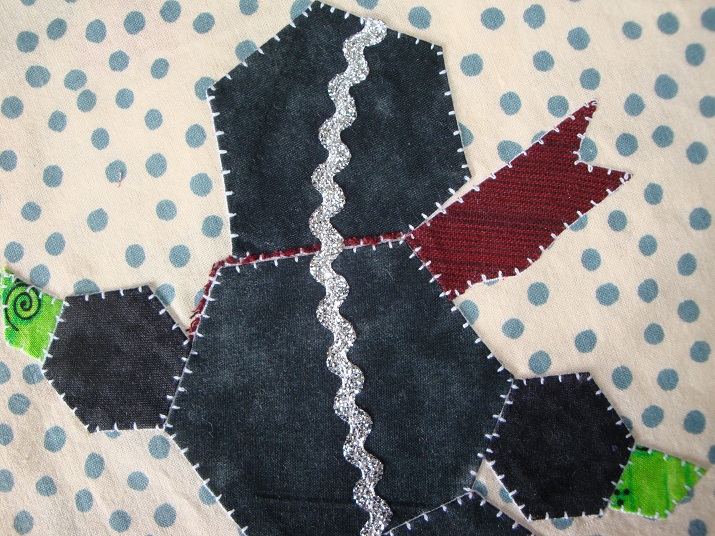
My new project--a family tree quilt--has lots of tiny and odd shaped pieces; and if I was going to survive the applique process, I needed a solution to getting those pieces to release from the paper.


My Alternate Method: (Wonder-Under)

This transfer web works differently than my favorite fusible; and it didn't take too many times to "retrain" my brain to remember to do this one extra step.

THE EXTRA STEP:
Release one edge before cutting out the applique design.


Required is a loose edge to grip when tearing off the paper after the image has been fused; then you will be able to separate it successfully.
 
When the piece has been fused properly, it will lift easily. If the web seems to tear from the paper as you try this; then refuse as it hasn't melted properly onto the fabric. Cool, and try again.
 
 
Tip:   If you still can't easily separate the paper from the fabric with your fingertips, use a seam ripper as it works well to get in between the paper and the fabric. Then if fraying results at this edge, which is outside the cutting lines, it won't ruin the applique piece.


LIFT UP ONE EDGE--SEPARATE PAPER AND FABRIC


Pull the paper back to separate it from the fabric, about 1/4" or so within the cutting lines. Then finger press it back down. Hold this piece in place and begin cutting out your design from this point. After the applique is completely cut out, lift this edge and gently pull off the release paper.


PULL PAPER BACK TO WITHIN CUTTING LINE


So, this is how I developed my plan:

DRAWING OUT THE IMAGES:
With this web, I allowed extra space between drawn images. This gave me extra white space outside my drawn lines after cutting the applique pieces apart. I thought I would need this space all around the design; however, it is most important to have extra on the edge you will pull to start releasing the paper.


FUSING AND CUTTING OUT THE DESIGN:
In this case, I could not get the paper to release, no matter what I tried. So my method was what actually worked.... Before cutting on the lines, remember to release one corner or edge of the applique. Then begin cutting out the piece from where you lifted the edge. This is easier to cut first as the rest of the applique is still held securely in place.


*******************


So with this worked out, I can actually say that my project is going very well. Would I go back to using Steam-A-Seam when it returns to my quilt shop, well, yes I would!! There are some other features that it has that I love.

Sometime, I'd like to do a review on several types of web to compare their features. This would help me know which products are best for certain projects. And, it certainly would be a good idea to have more options because running out of your favorite products is undesirable.


Hang in there and happy crafting.


Tuesday, April 30, 2013

Cleaning Your Iron

I prefer to work with appliqued elements on my quilt projects. And, my favorite technique is still machine fused applique using Lite Steam-A-Seam 2 fusible web. Therefore, this gives me the added task of ensuring my iron stays away from that sticky fused residue.

But, does it.....

Simply, no.
So here is what I do to keep my iron clean, longer.


Keeping It All Clean

Method One... 


I know there are great products on the market to keep that iron base clean; however, it isn't usually the thing I think about when out shopping. And... I would still rather spend my money on fabric!!

So, when I need to clean my iron; and I either don't want to spend money for it or am not near a store to buy some. I head down to the kitchen and get the Comet and a damp cloth. I've used this method a few times and am very happy with the results.


Here is my proof on all this...


BEFORE...


... AFTER


PS.. I also used the Comet on my green cutting mat, and it took off a lot of black marks and grit. I have no idea what one should use to clean them, but this did work.


Method Two... 


Since all things still do get dirty even after our best effort and wishing it wasn't so.... that iron will still give it's best effort at ironing and pressing our projects. And in the process, will pick up whatever it comes in contact with, such as: pencil, ink, or fusible web.

Sometimes it just has a hissy fit and sputters out water when the steam feature is used. So if or when any of this stuff happens, I've adopted another way to keep both fabric and iron clean.....


by using a pressing cloth. I have some thin, white cotton fabric that never gets picked for any quilt projects. Now, it works perfectly as a pressing cloth. If you look on the photo, I placed an "x" in the top corner to show you that it's important to mark the right side. This way, it always faces up; not allowing the iron to mess up the fabric or the fused applique pieces from messing up the iron.


Generally, one wouldn't think the pressing surface would get so dirty, but it does. If all we used our irons for, was pressing freshly laundered clothing, that may be so. However, it's all that other stuff we prefer to use the iron for; creates opportunity for this to happen.
 
 
Now, all I need to clean are those quilting gloves.  Haven't ever remembered to look at the package instructions or go online to see how to clean them.   ....perhaps one day I'll get to that as well.


Hang in there, and happy crafting!!


Friday, April 19, 2013

Applique Stitches

Have you ever tried fused machine applique—on a quilt project? I’ve collected some of my work; and with these images, want to demonstrate the various stitching methods and thread colors that can be used. You may use only one stitching method or a combination of these stitches on your project.

Here is how easy it is to create beautiful designs.

Buttonhole Stitch:


This is a favorite stitch for finishing up the edges of the raw-edge fused applique method. It can be done by hand or by machine. Some people like to do it in the traditional color of black; however, any color can be used, as it depends on what project goals are in mind. 

I love experimenting with thread color and so have done it using different colors, such as: black, green. Generally, I like using green for floral designs and plant life; and black for most other designs. If you don't like the black, as shown below, then choose other colors.
 
Coneflower--buttonhole stitch
Appliqued with all green thread.


Butterfly--buttonhole stitch
Appliqued with all black thread.


Holly and Ivy--combines buttonhole and zigzag stitching
Leaves-green thread; Berries-red thread
 
Images: The holly and ivy design was all done by machine. For those curvy lines, I just used a straight stitch and went over the lines twice. 


Applique Stitch:


Another stitch that is similar to the buttonhole stitch; it is called the applique stitch. I have this one on my sewing machine. It is a bit less bulky, and is also a faster method because it uses less back and forth stitches in the process of creating each stitch.

This stitch I have done using a variety of colors and they all look great in the design. The thread color can match the applique piece; or be in contrasting colors, such as: white on black, red on red, black on any color. 


Orange heart--applique stitch
Blue/Green tulip--buttonhole stitch
Green/Yellow leaves--zigzag stitch


Hexagons--applique stitch
Appliqued with all green thread.


Hexagon snowman--applique stitch
Appliqued with all white thread.

Images: The hexagon blocks are from Block of the Month 2012 on Craftsy.
If you find creating hexagons too difficult on your hands or like that method, as little as I do; why not use a machine stitching to attach to your quilt.
 

Zigzag Stitch:


The zigzag stitch is a favorite stitch to use, as well, for applique designs. All machines have this stitch, and so if your machine doesn’t have the buttonhole or other applique stitches on it; you can still finish fused applique designs with stunning results.

It is the quickest stitch and allows one to finish up a quilt block with much greater speed. This may be one factor in choosing this stitch. My experience confirms that it can also be a great stitch to use when the applique piece has many curves or bends in it, as it can much more easily go around these shapes. The finished results feel smooth to the touch and can be a better choice, if you want a delicate result. 


Ghost--combines buttonhole and zigzag stitching
Appliqued with all black thread.


Orange blossom--zigzag stitch
Appliqued with thread matching fabric colors.


Peony--closeup


Peony--zigzag stitching
Appliqued with a variety of thread matching fabrics.

 
The quilt blocks for my "Flag Quest" designs will be appliqued with a variety of colors and using the zigzag stitch as shown on the Peony. These will be showcased later in another project. 
 
I wanted to show you how these stitches can make any design beautiful; and when you consider your next quilting project; perhaps you’ll be able to give this applique method a try.

For a quick little project, check out my mouse pad mini quilts on “My Craftsy Store”. Along with one free pattern, there are a variety of designs to choose from with more coming soon.

 
Hang in there, and happy crafting!!


Wednesday, April 10, 2013

Flag Quest Pattern

Do you like seeing your country’s flag blowing in the breeze? This design will allow that perfect image to flow under your mouse; each time you work at your computer and travel that universal network.


P   A warm and cozy place for your mouse to work and sleep when you are away.
P  Choose the pattern that best reflects your country's flag for you; and get two variations, in the pattern.
P  Add creativity; and produce your own unique mini quilt for your computer station. 


When I originally created this one, I did not know it would be such a fun experience to change the design to reflect so many world flags. The additional styles were fun to create and will be used in a new project.


I have changed my mind (several times now) on how I will sell them. Instead of the complete set of twelve, as shown below, I am going to offer some of them as individual designs. This allows the purchase price to be more compatible with the other mouse pad patterns.

After I publish a few; it will be up to individuals to request additional designs. This will free up my time for new ideas that are waiting to be tried. It also will allow me to just add those that would be of interest.

I also am not adding the Mouse Pad Collection logo to these patterns, as I've decided they can be used for either a mouse pad mini quilt or used as designs in other quilt projects. They will be getting a brand new cover.


As the theme of these mini quilts was originally to showcase how to make our computer station more quilt friendly; I designed “cat and mouse” and “mac and me”. The third one to fit into this technology theme was inspired by the Windows logo. From its bright colors and flowing style; my flag design was born. It's now ready for that twist to...

 
[Canada -- template pieces]


Create Your Own
So—get ready to go on your own quest—choose the template pieces and fabric colors that best fit your country’s flag; add creativity, and produce your own personal mini quilt. Or, perhaps, you wish to use pieces that remind you of where you’d like to journey to on your next adventure; whether real or imaginary. Feel free to embellish this one, as you wish, with both plain and printed fabrics.

Hang in there, and happy crafting!!


Friday, April 5, 2013

Special Sewing Day

I love the thought that I can still experience new ‘firsts’ in my life. This one was spent with my granddaughter; sewing up some projects she had requested. She loved helping me pick out fabrics, arranging stuff on my tables, and tidying up our workspace.

She really was impressed with how quick and easy a more complex design can be created. Our first blanket was the checkerboard pattern. With the leftover strips, I made the matching pillow.
Initially, it was a blanket and pillow for her little kitty. Then, she thought more pillows would be fun for her other special friends. Not wanting to waste the pieces we didn’t use, more blankets were made.

Here are the results of those happy hours we spent at my sewing machine, this week.


[Blankets and Pillows with Kitty]


[All Projects]


While I was finishing the sewing on the second day, she created some cute items with scrap fabrics and straight pins. Most of them are bugs, with others being baskets and boats. Aren’t they cute!
 

[Creative Bugs with Straight Pins]


We had also worked on a cover strip for a plastic jar; that just may become a piggy bank. This was a great project to show her how fused applique can decorate the fabric; and we used cat silhouettes in a colorful selection of fabrics.
 

[Cat Appliques on Fabric Strip]


She inspired me; and knowing that we’d do this again. My thoughts went to how I could rearrange my work space to accommodate her presence better.  By the time the day was done, we had a new arrangement and we both look forward to our next sewing adventure.


Hang in there, and happy crafting!!


Wednesday, March 20, 2013

A World of Flags

MINI QUILTS—MOUSE PADS

The last design from this collection:

My Flag

This emblem represents home; and the templates included, allow you to add your own creative twist to make it your own.
 
OOOOOOOOOOO

However, here are the new details:

I was originally making only twelve flag styles...until I got to thinking about what I'd do with all these flags. I didn't really want all those designs to become mouse pad mini quilts. So I thought up another idea for a project. That meant I'd need more flag blocks.

The problem was that I kept changing my mind on how and which designs would be featured in patterns to sell. After some time, I think I've figured out how to approach this dilemna.

My new plan is to create a few flag styles and let people suggest new ones. From those ideas, I'd see where they'd fit in and add those patterns.


FROM THE OLD LIST:

I can still use the flags I've made and appliqued for my new project. And, any individual patterns I make will have a featured flag. It may come from the list below. 
 
µ  Algeria
µ  Canada 
µ  Congo
µ  Germany
µ  Italy
µ  Japan 
µ  Mauritius
µ  Monaco
µ  Panama               
µ  Thailand
µ  United Arab Emirates
µ  United States

     O   Fabric requirements will be shown for the featured flag style, only as it will give a good representation of materials needed; as most are scrap  pieces. 
     O   All templates will be full-size and reversed for fused applique. Whenever I can, I'll include additional design elements, such as: stars, circles, etc.

     O   A blog tutorial-type instruction will be posted whenever it would be helpful to certain design elments. 
     O   This additional information will provide “extra tips and hints” for using these basic flag styles to create other flags that aren’t in the pattern.
 

Your mechanical mouse will be warm and snug in its cozy quilt as you do your work. And, now you can also add your own country’s flag to this location. More details and pattern coming soon.....


Hang in there, and happy crafting!!


Tuesday, March 12, 2013

Daffodils and Tulips

Quilts add color to any space they occupy; sometimes, they are meant to just add color and warmth to a particular place in our homes. At other times, they are a warm, cozy covering as we sleep.

So, I thought—why not add a splash of color to our computer work station—as many of us tend to spend a lot of time there. And, I like the idea of giving this mechanical mouse a cozy quilt to sit on as we do our work. There we can enjoy this mini quilt as we dream up new ideas, or find more projects to add to our wish list.

<><><><><><><><><><><><><><><><><><><><><><><><><><><><><><><><><>
PART TWO
 
Mouse Pads - Back
 

<><><><><><><><><><><><><><><><><><><><><><><><><><><><><><><><><><><><><>
 MINI QUILTS—MOUSE PADS 

The next three designs from this collection include:

 
My Pod

             This design may inspire you to plant a garden; or make you hungry for garden fresh peas. Hope you enjoy this design for whatever reason you’d want to make it. It’s quick and easy.


(This pattern is now available FREE. Give it a try and see how easy fused machine applique, really is!)


Basket of Flowers

Flowers are great for incorporating into our quilt projects. And delightfully bring color and beauty into our homes; whether fresh and fragrant, or stitched into charming quilts for our viewing pleasure, all year long.


Sewing Machine

If you are here—you love your sewing machine. Perhaps, this is the mini quilt you’ll want to have next to your computer for your mouse.


These patterns (currently fused applique) include:
  • Colored illustrations
  • Clear instructions
  • Full-size templates for the applique pieces, already reversed for the fusible applique process. 
  • All these designs are fast and easy and will make a great gift to give to someone that you love, even yourself.
To see more on these designs, click on MY CRAFTSY STORE logo at the right-side column of this page.
 

Mini Quilts - Mouse Pads
 
Next time, I hope to share the remaining design in this collection. This one is getting an update with an interesting twist, so that I can sell it in ‘my crafty store’.
 

Hang in there, and happy crafting!!


Monday, March 4, 2013

Cat and Mouse

I started designing a few quilt patterns back in 2006 and found it very inspiring. After that, I thought I needed to explore other designer’s patterns and learned many different techniques. With the internet such a great place to explore; it is always intriguing what creative people experiment with and come up with for new ideas.

Also, on this journey—I have found many great sites to learn through videos and online classes and find an endless supply of new projects to add to the wish list. May you find this collection another way to give your home another spark of color and warmth.
 
<><><><><><><><><><><><><><><><><><><><><><><><><><><><><><><><><>
PART ONE
 
Quilt Bindings
 
Quilts add color to any space they occupy; sometimes, they are meant to just add color and warmth to a particular place in our homes. At other times, they are a warm, cozy covering as we sleep.

So, I thought—why not add a splash of color to our computer work station—as many of us tend to spend a lot of time there. And, I like the idea of giving this mechanical mouse a cozy quilt to sit on as we do our work. There we can enjoy this mini quilt as we dream up new ideas, or find more projects to add to our wish list. 


Quilt Backs
 
<><><><><><><><><><><><><><><><><><><><><><><><><><><><><><><><><><><><><>
MINI QUILTS—MOUSE PADS

The first four designs from this collection include:


Cat and Mouse

In this design, give the cat opportunity to play the game, "cat and mouse” while you traverse through your favorite websites.


 Mac and Me

If we relate to our favorite technology, then we don't just think of apples as fruit. Cheers to those that love their "Mac".


Curling Rocks

Know someone that loves curling? If you do, then you know that curling is never far from their minds, and this design will definitely be a hit. “Hurry hard!”


Wind Blown Rose

This design will be as delightful to make, as it will be to give to someone you love or keep for yourself—allowing it to reflect your affections. Whether you think of long stemmed roses, or those cheery wild roses growing out in nature; they all have a cheery disposition.


My patterns (currently fused applique) include:
  • Colored illustrations
  • Clear instructions
  • Full-size templates for the applique pieces, already reversed for the fusible applique process. 
  • All these designs are fast and easy and will make a great gift to give to someone that you love, even yourself.

To see more on these designs, click on MY CRAFTSY STORE logo at the right-side column of this page.


Mouse Pad Mini Quilts


Next week, I will share the remaining designs in this collection.


Hang in there, and happy crafting!!


Saturday, February 23, 2013

Where’s My Fabric…

After arranging our workspace to suit our needs—what else can we do? My best guess would be to ‘sew something’. Test out the arrangement and see if it feels ‘right’. And, if something isn’t working, alter it to make it work better.


FABRIC STORAGE:
Some creative ways to sort and display your quilting fabrics, enjoy this post!

Fabric Ready for Sorting


One area that I have found must feel 'right' is my fabric storage area. When I first began, I used my plastic storage containers as I had no other place to arrange it.
 
Fabric in Storage Drawers


Then after a move and an alteration in work space, I wanted a better method. So I found a great used furniture place and was able to get a great hutch/buffet. I loved this arrangement.  

Buffet/Hutch


Then another move; and I really needed the hutch/buffet in the kitchen for plates and glasses. So I looked again, and found a great buy in a local store for a wooden cabinet that has five shelves.

Storage Cabinet with Five Shelves


Now that I am in a different house, I couldn’t use either hutch or cabinet because my sewing/quilting space has slanted ceilings and stairs that would not allow such furniture to get up to that level. So I tried putting my fabric back in those plastic storage containers that I had once used; and was not happy with this old arrangement.

<><><><><><><><><><><><><>
I found that I really liked my fabric stacked in piles of separate colors—making it easier to take the whole stack or only a few pieces. After using what was needed, it was so easy to place it back on the stack.
 <><><><><><><><><><><><><>

So after I re-arranged my work space, found that I had room for a bookshelf. And, once again have my fabric in stacks like I had before. Now, the hope is that one day I can once again use my favorite hutch/buffet in my sewing space, but that will need to wait until that time comes around.

Bookshelf Displaying Fabric

For now, I just need to get into my newly arranged space and quilt up something fun!! I am hoping the weather warms up soon, so it isn’t so cold up there. However, for now, a portable heater can really make a difference, and after I get my data entry caught up, I should have some time to sew something.

Hang in there, and happy crafting!!